How to Sew a Linen Pinafore Apron
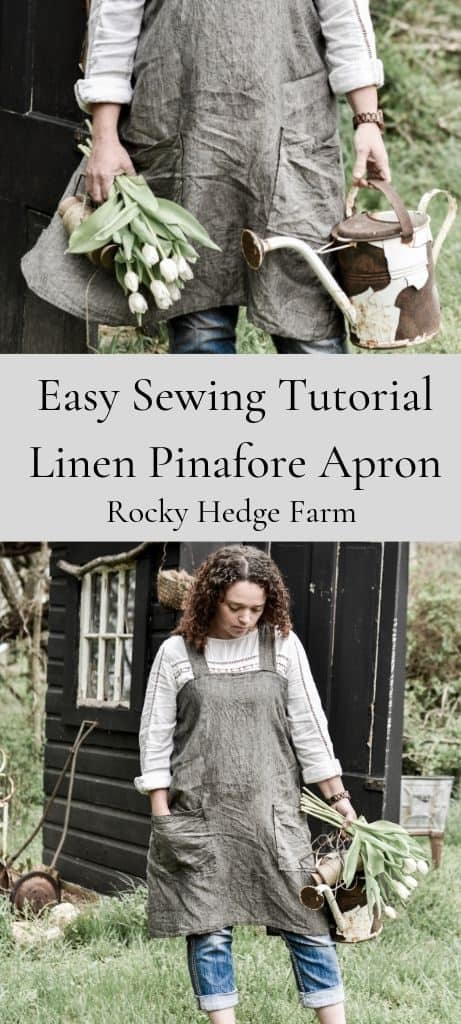
I recently took a sewing class and learned how to sew a linen pinafore apron. With just a few supplies and simple sewing tutorial, you can also learn how easy it is to sew your very own linen pinafore apron.

Linen Fabric for Pinafore Apron
I love linen fabric and often use it in my home. Everything from linen towels, bedding, and clothing. The first linen pinafore apron I made, I purchased 100% linen fabric by the yard. However, that can be really costly. So, when I discovered this tablecloth that is 100% linen for under $25.00, I knew I had found a good deal.
Linen Pinafore Apron Supply List
For making my apron I used
1 Linen Tablecloth or use 2 yards of fabric
Cutting Mat
Cutting Ruler
Rotary Cutter
(You can also purchase all three of the above-mentioned items in a set)
Scissors
Thread
Iron
Sewing Machine
DIY Linen Pinafore Apron Cut List
Measure just above your bust line and add 8” or 10” depending on how loose you want your pinafore apron to fit. Mine was 40” plus 10”.
Then, decide how long you want your apron to be. Measure from the top of your bust line to the bottom of where you want the apron to fall. Add 3” inches to that original measurement. So, mine was 33” plus 3”.
Your main apron piece will be the above-figured measurements so, I started with a rectangle piece of fabric that measured 50 x 36.
2 shoulder straps that measure 22” x 5”.
2 pockets that measure 10” x 9”.
DIY Linen Cross Back Pinafore Apron | YouTube Video Tutorial
How to Sew Linen Pinafore Apron Instructions
- Cut a rectangle piece of fabric into the dimensions that you figured above. Again, for me, my rectangle was 50” x 36”
- Then, cut the straps for the apron. They will need to be cut to 22” x 5”.
- Cut two rectangles for the pockets that measure 10” x 9”. If you choose to have smaller or larger pockets, then cut them to your size preference.
- Take the large rectangle apron piece, and on the sides of the apron that will be the back edges (for me this was the 36” section), press 1/2 inch with the iron, then fold over another 1/2 inch to hide the raw seam and press again.
- Sew down the two sides using a 1/2 seam.
- Press the top edge of the rectangle down by 1” and then fold over and press down another 1” to hide the raw edge. Don’t sew this area, just yet because you still need to place your straps.
Linen Pinafore Apron Straps
- Fold the straps in half long ways. For the linen fabric, there really isn’t a right side or wrong side. However, if you are using a printed fabric, then you will want the right sides together.
- Sew 1/2” seam all the way down the side of the strap, back stitch on both ends.
- Turn the straps inside out and place the seam on the center back of the strap. Press flat.
Linen Pinafore Apron Strap Placement
- Find the middle of your apron by folding it in half. Just lightly press the center so that you know where it is or mark it with a straight pin.
- Unfold the pressed edge so that you are working with the upper raw edge of your apron.
- Place the measuring tape in the center of the apron that you have marked, and then measure 3” over to the left and pin one of the straps in place. The seam side of the strap should be facing up towards you. Then measure over 3” to the right and pin the other strap in place.
- Then take the unpinned end of the right strap and pin it to the left back side of the upper edge. Then, take the unpinned end of the left strap and pin it to the right back side of the upper edge. I know that this can be confusing, so please watch the video to understand this step a little bit better.
- Sew a straight line down the raw edge of the top of the apron to hold the straps in place.
- Then, lay your apron back out with the wrong side up. You will want to fold the raw edge of the apron back down, but the straps will now be facing up. Pin them in place. Again, the video shows and explains this in a much easier way.
- Then, you will sew two straight lines down the top of the apron where the straps are.
- Set apron aside to work on the pockets.
Linen Pinafore Apron Pocket Placement
- Fold the top part of the apron pocket down 1” and press, then turn down another 1” and press again. Sew a 1/2” seam.
- Fold the other 3 sides of the pocket edges in 1/2” and press.
- Try the apron and decide where you want your pockets. Pin them in place.
- Then take the apron back off and measure the distance between the edge of the pocket, and the distance between the bottom edge and the bottom of the pocket. You will want to be sure that both pockets are the same on each side. Again, please see video for full tutorial on how to do this.
- Sew the pockets in place.
Linen Pinafore Apron Hem
- Try the apron back on and determine how long you want the apron to be, trim if needed.
- Then, turn up 1/2” and press, turn up another 1/2” and press.
- Sew hem.


Sewing Classes
One of my goals this year was to become a better seamstress. I know a lot of the basics but there is a lot that I want to learn. One of my friends, Nancy, just opened up a local sewing shop. It is called Hodge Podge Paisley by Nancy, and not only does she sew custom pieces but she also offers classes for all stages of those who sew.
I took my first class with her to learn how to make this linen pinafore apron and she was gracious enough to allow me to share how to make one here on my blog. Now, if you would love to have a Japanese style linen cross back apron, but don’t want to make it yourself, then please contact Nancy. I know she would love to make one for you


Super cute! Your directions are just great. I followed right along in my mind as I read. Wish it wasnt so hot where I live. Looks so cute and romantic to wear an apron in the garden. But even linen would be uncomfortable here. Maybe I will just make it for my new hair cutting apron. My old one is looking bad. Thanks for sharing!
Thank you so much for providing such easy to follow instructions. Love this apron.
So smart using a tablecloth! Did you make your pants, too? Super cute with the lace trim!! @Julie…I live down here in TN and Linen actually is WONDERFUL to wear when it gets hot! It’s a natural fiber cloth, so it breathes really well. If you do “perspire” (lol) it dries really fast. But because it’s so breathable I find it helps keep you cooler ??
Thanks for the amazing detailed instructions! I did it!
Wonderful!! I am so glad you were able to make one!
This tutorial was fantastic. I took a sewing class in high school so I somewhat remembered the basics of using a sewing machine, but it’s been nine years since I’ve used a machine. I was able to follow these directions with ease. The video was also super helpful. Now I have a new apron to use in the kitchen and I’m really proud of my self for making it. Thank you!
Great apron!
This is ideal for a beginner too.
However; for a beginner especially, if be inclined to leave one of the original hems on the tablecloth that will be used as the bottom hem to the apron.
For those who are on a limited income or those who don’t do a lot of sewing, the pattern can be cut with just a pair of decent scissors, without going to the expense of buying the rotary cutter, cutting mat and ruler. (For those three items in the UK you’d be looking at spending in the region of £50 – and that’s not including extra spare blades for the cutter)
I’ll be making the apron for sure!
But I’ll adapt mine slightly so the apron overlaps more on the back to cover my bum and possibly add a box pleat on the centre front if there appears to be some excess fabric.
Why did you not use the parts that were already hemed? I cringed, I want to do as little heming as possible, your pattern is great, i absolutely love it, I will make me one out of another type of fabric for all my painting, and the linen one for gardening! Again, thanks!
Best tutorial for the exact apron I want. Thank you for sharing, I can’t wait to get started.
Wonderful! So glad that you enjoyed the tutorial!
What a great video! Your directions are very simple and logical. It’s a really nice apron!
Excellent tutorial. Thankyou. Where did you get your pants. They are so cute
They were thrifted! Thank you!
Thanks for the reply. I want some like that. Maybe you can teach us how to make some 😉
I didn’t make them. They were thrifted.
My granddaughter is 5’8″ tall. How long should I make it?
Thank you for sharing your tips and explaining the process for the making of this apron. I made one today and I love it! I will surely make some more and in different textiles (although your lining one looks gorgeous). I love how comfortable this apron is (it doesn’t get in the way) and I love the big pockets or one single huge pocket (I never get back from the garden empty handedly, hence pockets are so welcome :-)). Just love it! (from Belgium)